Sourdough Cinnamon Rolls

I’ve been trying sourdough recipes with a starter I have. the starter I have originally started as just a flour and water starter that I received, but I started adding a cup each of flour, sugar and milk to make it similar to the starter I was using 25 years ago.

The recipe I went with was a guarenteed rise cinnamon rolls. I think one of my mistakes was my milk wasn’t lukewarm, and our power went out right after I put all the first ingredients together. The power was out approximately an hour before we came back to the recipe between step one and two and nothing seemed to rise during he recipe.

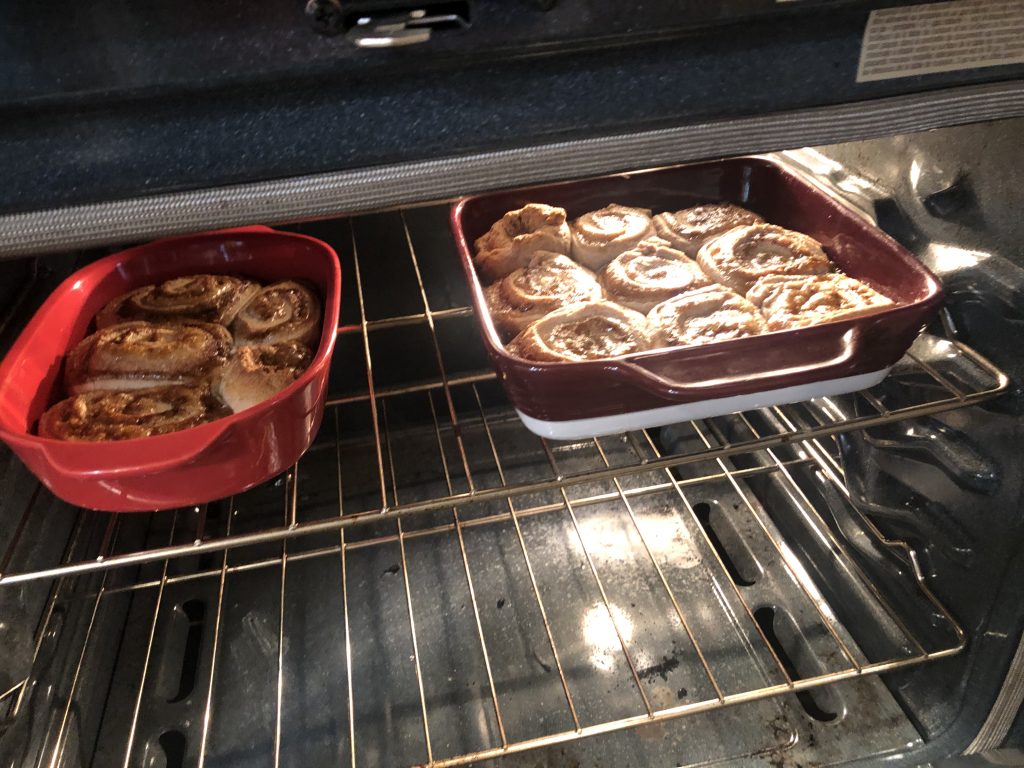
Baking the rolls, they became browner than I would have preferred, and my icing wasn’t as ‘spreadable’ as I would have liked. All the rolls did get eaten though. I may try this recipe again reducing the cooking time and trying to find a way to coax the dough to rise. – Maybe making sure the milk is warm and that the dough gets mixed up early in the process with out the yeast sitting for too long before use. (I may try later today)

Cinnamon Rolls in the over

Print Recipe

Rory’s Guaranteed Rise Sourdough Cinnamon Rolls

This is my go-to recipe for cinnamon rolls, sticky buns, etc. The sourdough starter we use has been passed down for generations in my husband’s family. It gives the rolls the characteristic sourdough punch that contrasts well with the sweet filling and frosting.

Source: allrecipes.com

Course: Breakfast

Prep Time: 45 min

Cook Time: 35 min

Total Time: 1 hr 20 min

Yield: 8

Serves: 8 Scale Update

Ingredients

  • 4 cups all-purpose flour
  • 1 cup fed sourdough starter
  • 34 cup lukewarm milk
  • 34 cup white sugar
  • 1 teaspoon instant yeast
  • 12 cup butter melted and cooled
  • 1 egg at room temperature
  • 12 teaspoon salt
  • 12 cup butter melted and cooled
  • 1 cup brown sugar or more to taste
  • 3 tablespoons ground cinnamon
  • 12 pound confectioners’ sugar
  • 1 (4 ounce) package softened cream cheese
  • 14 cup softened butter
  • 1 teaspoon vanilla extract

Directions

  1. Mix 1 cup flour, starter, milk, white sugar, and yeast together in the bowl of a stand mixer. Let stand until spongy and bubbling, about 5 minutes. Add 1/2 cup butter, egg, and salt; stir to combine. Add remaining flour 1 cup at at time until a soft, slightly sticky dough forms.
  2. Transfer dough to a floured work surface; knead until dough comes together, 3 to 5 minutes. Place in a greased bowl. Cover with plastic wrap; allow to rest until doubled in size, about 1 hour.
  3. Preheat oven to 375 degrees F (190 degrees C). Grease a 9×13-inch baking pan.
  4. Punch dough down; transfer back to the floured surface. Roll into a square 1/4-inch to 1/3-inch thick. Spread 1/2 cup butter on top; sprinkle brown sugar and cinnamon on top. Roll dough up tightly; pinch seam together.
  5. Trim the edges and cut the log into 8 equal pieces using a sharp knife. Place rolls in the prepared baking pan. Cover with plastic wrap; let rise until not quite doubled in size, about 45 minutes.
  6. Bake in the preheated oven until golden brown, about 35 minutes. Remove from oven; cool for 20 minutes.
  7. Mix confectioners’ sugar, cream cheese, 1/4 cup butter, and vanilla extract together until frosting is smooth and fluffy. Top each cooled roll with an equal amount of frosting.

Amount Per Serving (8)

  • Calories: 894
  • Protein: 11.8 g
  • Sugar: 75 g
  • Carbohydrate: 134.4 g
  • Fat: 35.7 g
  • Cholesterol: 117 mg
  • Sodium: 427 mg
  • Fiber: 3.8 g


Home Chef and Air Fryer

Our latest Home Chef meal was shrimp tacos. We’ve had a few choices lately that involved foods that wanted me to fry the meat in a pan of oil. I’ve been trying to go healthier and have gotten the Ninja Air Fryer – it’s really a fryer, grill, baker, dehydrator and more….

The recipe for this meal included shrimp to toss in a mixture of a flour type coating and seasoning mixed together. I mixed all the coating together in a bowl and tossed the shrimp in, stirring it around to get it all coated. I have the Ninja Grill and Air Fryer, so I set mine to Air Fry for about 7 minutes. With my fryer I didn’t touch any other settings and just let it preheat and reach the ‘add meat’ message before putting in my shrimp. I did then spray my shrimp with Canola Oil from a container I have that says it has a smoke point. Up until recently I hadn’t thought about the smoke point of my oil. I love olive oil and was just using it for everything! After facing the umpteenth time of setting off our smoke alarm – and ours is hooked the entire house system and super LOUD, I’ve realized it’s time to take into account the smoke point.

Air Fried Shrimp

The Shrimp came out perfect! The box also included tortillas, fried pickles, corn, cheese and a slaw type mixer to create for toppings. I laid everything out and we were ready to eat. The air fryer is super easy to clean also making after dinner just a little easier. I’ve been finding I can turn about half the meals we get from Home Chef in my air fryer with just a few little changes that make everything so much easier. The toughest part has been determining the correct settings and amount of time.

Home Chef and An Air Fryer

Our family has tried several meal delivery services – everything from Home Chef to Blue Apron and even Gobble. They all have there pros and cons! Some switch meals more often and some seem to have meals that are more similar.

Recently looking at my recipe I decided to try my Ninja Air Fryer with my Chicken. I personally really don’t like standing in front of the stove with hot oil frying something while I try to find a way to keep the smoke alarm from going off. Even worse when the smoke alarm does goes off, which for our house is the WHOLE house. So this seemed like a great plan to try.

The first meal I tried was a breaded chicken breast. The recipe called for putting mustard on the chicken breast, then rolling the chicken in panko crumbs before putting my chicken in the air fryer. My Ninja air fryer has you turn it on and then wait until it heats up. After it gets warm, you receive a message to add your meat. This was at the air fryer setting for the default amount of time….. I think that was 20 minutes. While my chicken cooked I made the rest of the meal…. which really amounted to microwaving the corn with green onions, making mashed potatoes, and mixing a flavored butter. The chicken came out PERFECT!

Last night I decided to give it a try again with a salmon meal. The salmon didn’t need breading and only needed to be in the Ninja Fryer 10 minutes, but it worked just as well. With the chicken I had spritzed it with a little oil. Thinking back, I forgot that step with the salmon and it still came out perfect. No turning it over half way either. The salmon was skin side down, and it came out with crispy skin, and a great flakey taste. I fixed a mixed vegetables to go with and a flavored butter (with lemon and capers) to go no the salmon.

After cooking the Ninja air fryer just has a grill section and insides that lift right out for cleaning. I just finished putting ours back together after letting them air dry for the night. I haven’t tried the dehydrate and bake features of it, but if they are as easy, I need to give it a try soon!

Leftovers? Pasta Mixer!

Fourth of July leftovers are still filling our fridge and we need to use things up. I’m slowly trying to come up with new ways to use leftovers to make meals that we can have for dinner and use some up. Last night I decided to use up the cut up tomato and diced onion from the hamburger fixings…. Added to soup would have been a great idea, but it’s so hot outside! So I went with pasta…Not the coolest either, but I didn’t have to cook it over the stove or in a crockpot all day.

With a little oil in the pan, I added the tomato slices diced up, the diced onions, and finally some diced up garlic scapes that I’d just got from the farmers market. While I was frying them up, I boiled a pot of water with pasta noodles. Finally, to my veggies I added a package of sliced nuts that must have come with a salad at some point in the past, that had ended up in the fridge and never been used… and some sliced up parmesan that melted in to the pan.

After the sauce cooked down and the pasta softened, I mixed everything together. Tossing the pasta in with the sauce.
Tomato sauces aren’t my favorite, but my husband likes them a lot. He seemed to really like this! I still have a few left overs to use up. I’m thinking a frittata for this weekend!

Yorkshire Pudding

Yorkshire Pudding

This was my second try at making Yorkshire Pudding. It’s great as a side with a standard dish, especially with gravy. I’d really like try it with onion gravy next time! I think the original recipe I made came from Home Chef? I have it in my Plan To Eat menu planner now though, so it’s easy to pull up.

This recipe is super easy to make. I used my blender to mix everything – but I keep mine out on the counter and it’s really close and super convenient. This time I modified the butter ingredient to use spray oil that I sprayed in the bottom of the muffin cups. The regular recipe calls for butter melted in the bottom on each muffin tin, I was working on the assumption this was to keep them from sticking and not to add the butter as an ingredient.

Our oven is still all wonky, though I have an oven thermometer hanging inside. I calibrated the oven to the lowest heat setting (20 degrees less than what the temperature says) and setting the temperature at 375 degrees, the over was still showing that it had heated up over 400 degrees. – I suspect mine this time overcooked some being at higher temperatures throughout the entire time. In the middle of working on other things – loading my car for a farmer’s market, I didn’t want to watch the over temp like a hawk and keep adjusting, so I went with what it thought 375 was.

The recipe I went with mixed 1 cup each of flour and milk and added 3 eggs. This batter was then added to the muffin tins. In the middle of filling I realized I should have used two muffin pans. Mine were filled more than they should have been…. but they still came out. I then put them in the over at 375 for 5 minutes – at the end of the 5 minutes, I adjusted the temperature of the oven down to 350 and baked them another 25 minutes.

Taking them out at the end of the baking time, they were done! I couldn’t wait to eat them, but wow they were hot fresh out of the oven. They don’t have a huge amount of taste, so I really want to try them with onion gravy. Time to find that recipe next!